Support for IDEs#
The Leap quantum cloud service supports third-party IDEs, both local and cloud-based, that implement the Development Containers specification (aka “devcontainers”). Although any IDE that implements devcontainers is supported, D‑Wave recommends GitHub Codespaces.
The Ocean SDK releases 6.6 and higher enable authentication using the secure OAuth 2.0 industry standard. The Authorizing Access to the Leap Service procedure described here simplifies the retrieval and storage of your Solver API (SAPI) token for use in submitting problems to solvers in the Leap service from the third-party IDE of your choice.
For an overview about developing quantum applications, see Workflow for Developing Quantum Applications; for a beginner’s introduction, see the Getting Started with D-Wave Solvers guide. Also see end-to-end examples of D-Wave quantum applications in GitHub.
Requirements#
Ocean SDK releases 6.6 or higher.
If you configure your IDE to use Ocean-Dev Docker Images, your development environment is updated with a recent Ocean SDK release. You can see an example here.
Authorizing Access to the Leap Service#
As described in the Ocean software’s Configuring Access to Leap’s Solvers documentation, you require a SAPI token to submit problems to solvers in the Leap service. The following procedure authorizes the Ocean software access to your account in the Leap service and enables storing your SAPI token in your development environment. Ocean software authorization to access the Leap service persists across subsequent development sessions for this development environment.
Note
The following OAuth-based procedure is provided for convenience but you also have the option of manually copying your SAPI token from the dashboard in the Leap service. The Ocean software’s Configuring Access to Leap’s Solvers documentation provides more information.
This procedure uses the
Ocean software CLI
commands that you enter into your terminal. You can see help documentation
for these commands and all their options with the CLI’s --help option.[1]
For any new developer environment (for example, a Python virtual environment or a GitHub Codespaces codespace), authorize the Ocean software access to your account in the Leap service, using the secure OAuth 2.0 code exchange, by running one of the following commands from your terminal.
In an environment such as an IDE installed on your system, where you can access localhost addresses from your browser, initiate the OAuth redirect flow:
dwave auth login
In an environment such as a cloud IDE, where access to localhost addresses from your browser might be blocked, you can initiate the alternative OAuth out-of-band flow:
dwave auth login --oob
If you are not currently logged into the Leap service, you are asked to enter your credentials.
Figure 134 shows the login screen.

Fig. 134 Login screen in the Leap service.#
When you are logged into the Leap service, you are asked to grant the Ocean software permission to fetch an authorization code.
Figure 135 shows the authorization request.
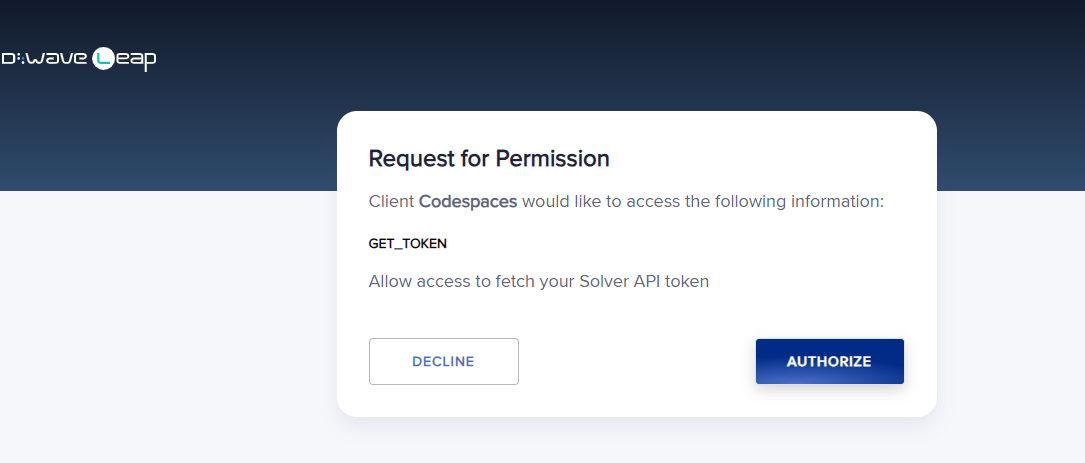
Fig. 135 Authorization request screen.#
Click the
Authorizebutton.For the OAuth redirect flow, the authorization code is now stored in your development environment; for the OAuth out-of-band flow, your browser displays the authorization code.
For the OAuth out-of-band flow only, copy the authorization code to your terminal’s “
Authorization code:” prompt, similar to the representative shell lines shown below:$ dwave auth login --oob Please visit the following URL to authorize Ocean: https://leap.dwavesystems.com/leap/openid/authorize?response_type=code&client_id=96... Authorization code: 717983...
Figure 136 shows the authorization code returned in a browser tab for you to copy to the terminal prompt.
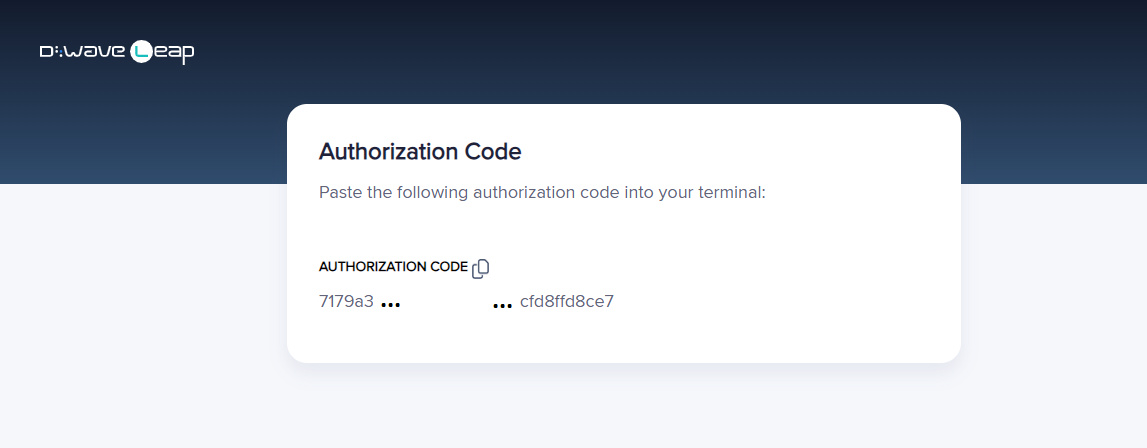
Fig. 136 Authorization code screen#
Create a dwave-cloud-client configuration file to manage your SAPI access by running the following command from your terminal:
dwave config create --auto-token
Validate the configuration by running the following command in your terminal:
dwave ping
If you cloned a D‑Wave example, you can now run it.